Using Maki Icons in TileMill
Installed TileMill on your computer.
Reviewed the Crash Course, in particular using conditional styles.
Maki is a point of interest (POI) icon set for TileMill. On a typical base map, POIs provide context by highlighting things like schools, businesses, and parks. Maki icons are clean, clear, recognizable, and work well with a wide range of map types.
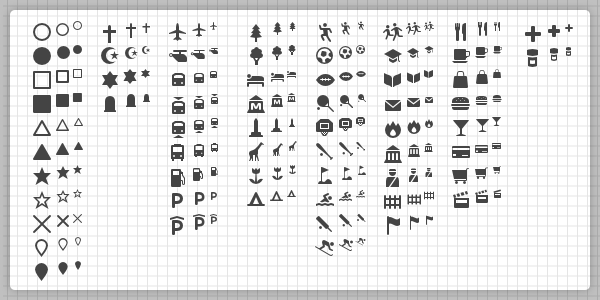
Each symbol comes in three sizes: 24px, 18px, and 12px. They are designed to look sharp even at the smallest size. All the icons have a white outline so they are legible against both dark and light backgrounds. Currently Maki covers most of the basics and we plan to continually expand the range of symbols.
Downloading Maki
Download the Maki icon set, and unzip it. There are two folders in the Maki project that contain the icons:
- src contains the icons in SVG format. This is generally recommended for use in TileMill as there will be a couple extra features available for them.
- renders contains the icons in PNG format, including double-resolution versions for high-DPI displays. These are best for the Web, but can also be used in TileMill.
Basic Styling
It’s easiest to work with Maki icons if you have a copy of them in your TileMill project folder. Copy the src directory (or renders directory) there and rename it to maki.
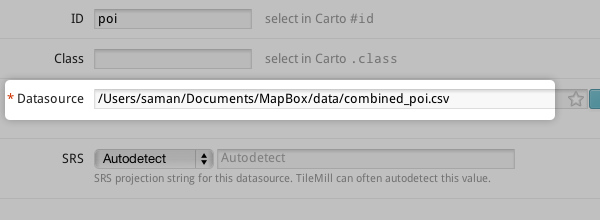
If you want to follow along with the same example data we’re going to use, download this CSV of POIs in Washington, DC from OpenStreetMap. Add it as a layer in TileMill and set the layer ID to poi.
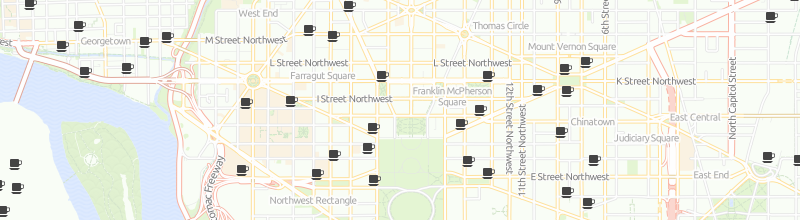
Use the marker-file CartoCSS property to add Maki icons to the map. You’ll need to use selection filters to limit your style to a particular category for each icon. Here’s an example styling cafes from the example CSV above:
#poi[category='Cafe'] { marker-file: url(maki/cafe-18.svg); }
Using different Maki sizes
Take advantage of Maki’s size variations to scale the icons based on your map’s zoom level. To do this, you need to add zoom level filters to adjust which image TileMill shows for each zoom level. Usually point of interest icons are only visible at higher zoom levels, as they start to clutter maps as you zoom out. For this example, lets leave them visible as a frame of reference because there’s not much of a base map.
#poi[category='Cafe'][zoom <= 16] { marker-file: url(maki/cafe-12.svg); }
#poi[category='Cafe'][zoom >= 17] { marker-file: url(maki/cafe-18.svg); }
#poi[category='Cafe'][zoom >= 19] { marker-file: url(maki/cafe-24.svg); }
Explore the data by clicking on the table icon in the layers palette and experiment with your conditional statements. As you add more icon types, it might make sense to organize your CartoCSS using nested style blocks:
#poi[zoom<=16] {
  [category='Cafe'] { marker-file: url(maki/cafe-12.svg); }
  [category='Pub'] { marker-file: url(maki/pub-12.svg); }
}
#poi[zoom>=17] {
  [category='Cafe'] { marker-file: url(maki/cafe-18.svg); }
  [category='Pub'] { marker-file: url(maki/pub-18.svg); }
}
#poi[zoom>=18] {
  [category='Cafe'] { marker-file: url(maki/cafe-24.svg); }
  [category='Pub'] { marker-file: url(maki/pub-24.svg); }
}
Adjusting colors
If you are using the SVG version of Maki (from the src directory), you can easily adjust the color of the icons using the CartoCSS property marker-fill property.
#poi {
  [category='Cafe'] {
    marker-file: url(maki/cafe-18.svg);
    marker-fill: #48b;
  }
  [category='Pub'] {
    marker-file: url(maki/beer-18.svg);
    marker-fill: #963;
  }
  [category='Restaurant'] {
    marker-file: url(maki/restaurant-18.svg);
    marker-fill: #b36;
  }
}
![]()
Adding interactivity
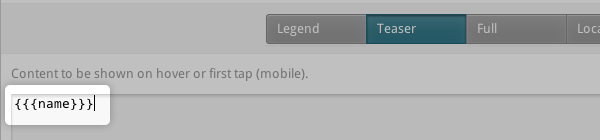
It’s easy to make your icons interactive based on the data contained in the CSV. Open the interactivity palette, click on the “Teaser” tab, select “poi” as the interactive layer, and then type {{{name}}}, which is output markup that will display the content of the ‘name’ column in the .csv in a pop-up when you hover over an icon. For detailed instructions on how to use interactivity, see the Crash Course.
Exporting a transparent overlay
If you delete or comment-out the Map and #countries styles, your icons will be on a transparent background and can be used as an overlay on another layer. Follow instructions to upload this overlay to MapBox hosting and composite it with another map.
Use MapBox to upload and composite your map.