Styling Polygons
Installed TileMill on your computer.
Reviewed Crash Course
Polygons are areas that can be filled with a solid color or a pattern, and also given an outline. When you start a new TileMill project with the ‘Include world layer and styles’ option checked (the default) you’ll already have a basic polygon layer and style ready. The fill color of the polygons is defined by the polygon-fill property, and it has some line styles as well.
Tip: everything covered in the Styling Lines guide can also be applied to polygon layers.
Basic Styling
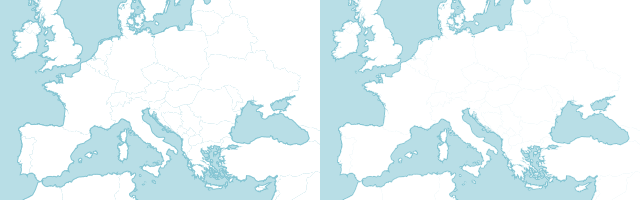
If you want to adjust the opacity of a polygon-fill you can use the polygon-opacity property. This is a number between 0 and 1 - 0 being fully transparent and 1 being fully opaque. With 75% opacity we can see both the map background and the lines that have been drawn beneath the polygons.

#countries {
  polygon-fill: #fff;
  polygon-opacity: 0.75;
}
Gaps and Gamma
When you have a layer containing polygons that should fit together seamlessly, you might notice subtle gaps between them at certain scales. You can use the polygon-gamma style to help reduce this effect. Gamma takes a value between 0 and 1 - the default is 1, so try lowering it to hide the gaps. Be careful about setting it too low, though. You’ll get jagged edges and possibly even stranger artifacts.
#countries {
  polygon-fill: #fff;
  polygon-gamma: 0.5;
}
Patterns and Textures
With TileMill, you can easily fill areas with textures and patterns by bringing in external images. You might create the patterns yourself in image editing software such as GIMP or Inkscape, or find ready-made images from resource websites such as Subtle Patterns or Free Seamless Textures.
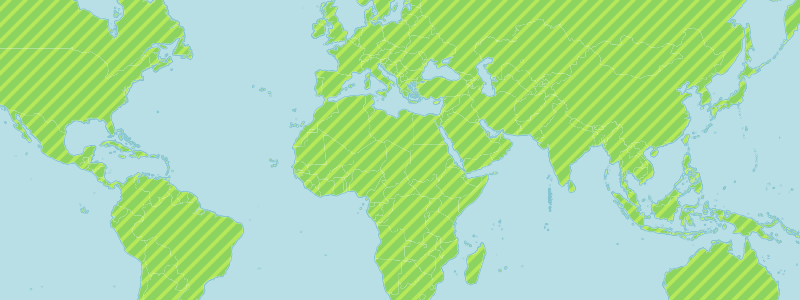
You can add a pattern style from any local file or web URL using the polygon-pattern-file style. Here is a simple diagonal stripe pattern you can use to try out - you can reference it from CartoCSS as in the snippet below.

polygon-pattern-file: url("http://tilemill.com/assets/pages/pattern-stripe.png");
For organization it’s a good idea to save and store images resources like this on your computer, for example inside your TileMill project folder. To see an example of this look at the Open Streets DC example: open your Documents directory in a file manager and navigate to MapBox→project→open-streets-dc. You can see that there is a subdirectory named ‘images’ and there are a couple of pattern images inside of it.
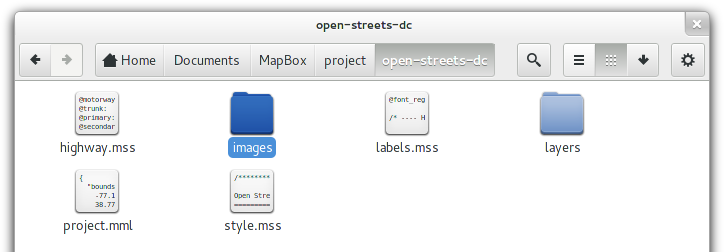
Images are stored inside the TileMill project they can be relatively referenced, meaning you don’t need to specify the full path of the file location. Your style would simply be polygon-pattern-file: url("images/water.png");. Doing this also makes the TileMill project more portable, for example if you want move it to a different computer.
Global patterns
If you want to add a pattern image to the background of the whole map, you can use the background-image property on the ‘Map’ object.
Map {
  background-image: url("pattern.png");
}
Like all other properties on the Map object, background-image has a global effect - it cannot be filtered or changed depending on zoom level.
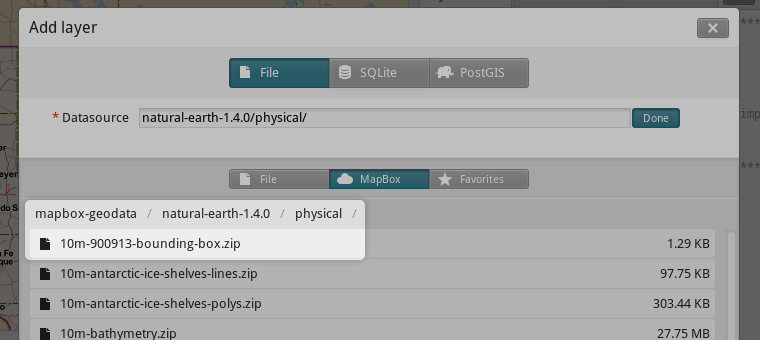
If you want to control the a background pattern by zoom level you can add a layer to your project that contains an earth-sized polygon for you to style. MapBox provides such a data file in the MapBox GeoData Library. Browse to the natural-earth-1.4.0/physical directory and it is the first file in the list - 10m-900913-bounding-box.zip.
You can style this layer like any polygon with a pattern or a solid fill and different styles for different scales. You can also put it above other layers and style it with a transparent pattern to create textured overlays (as in the ‘Geography Class’ example project).
Combining patterns & fills
Using transparency or compositing operations it is possible to get a lot of variety out of a single pattern image.
Ensuring seamlessness
There are two types of pattern alignment: local (the default) and global (specified with polygon-pattern-alignment: global;).
When a pattern style has local alignment, that means that the pattern will be aligned separately for each polygon it is applied to. The top-left corner of the pattern image will be aligned to the top-left corner of a polygon’s bounding box.
When a pattern style has global alignment, pattern images are aligned to the metatile instead of the geometries. Thus a repeated pattern will line up across all of the polygons it is applied to. With global alignment, pattern images should not be larger than the metatile (excluding the buffer), otherwise portions of the pattern will never be shown.
Another important thing to keep in mind is with globally-aligned patterns is that the pixel dimensions of the image file must multiply evenly up to the width and height of the metatile. If your metatile size is the default of 2, your metatile is 512 pixels wide and tall (2×256). Your pattern width or height dimentions could be 16 or 32 or 128, but should not 20 or 100 or any other number you can’t evenly divide 512 by. If you are using patterns from a resource website, you may need to resize them in an image editor to conform to this limitation.