Joining data to shapefiles
This guide will teach you, step-by-step, how to join your data to a shapefile so that you can quickly start making interesting maps. We will be using free, open-source software and public domain files to make it easy for anyone to follow along. At the end, you will have a shapefile with data that you can then import into TileMill.
Before we begin you will need the following:
- QuantumGIS installed
- LibreOffice (or OpenOffice) installed
- A spreadsheet of geographical data.
- A shapefile that matches your data’s geography.
Shapefiles
If you are relatively new to GIS or don’t yet have any shapefiles to work with, here are a couple of places to start:
- naturalearthdata.com - countries, states, provinces; cultural and natural borders
- U.S. Census Bureau - U.S states, counties, census tracts
A shapefile will come in the form of a group of several similarly named files with different extensions. These shapefiles will normally include some geographic attribute data such as names and id codes, but are mostly data-less. For the purposes of this guide we will be using a shapefile of the United States and joining it with population data.
Preparing your data
In order to join the two, you must ensure that both your data and your shapefile share a field or column with common values, called a key. This is often a name or ID code. In your data table, these identifiers must be unique, meaning one row per name or ID. Joining works by adding fields from your data table to the shapefile’s attribute table based on matching values found in the key columns.
In this example, the key in our data table will be geoid.
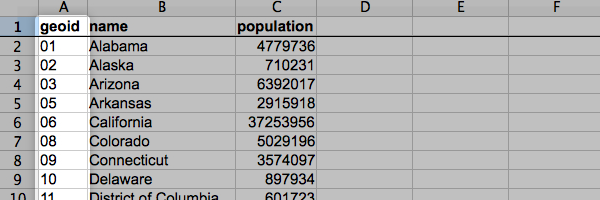 As you will soon see, there is a corresponding field in our shapefile. It would also be possible to use the name field here, but it is often risky to use place names due to the possibility of typos or spelling discrepancies.
Once your data is looking good you will want to save it as a .dbf file. This is the format that shapefile’s use to store data. Open your data in LibreOffice Calc and save it in .dbf format.
CSV format can also be used, but there is an extra step that must be done before joining. See the section at the bottom of this guide for more on this.
Using Quantum GIS to join your data
-
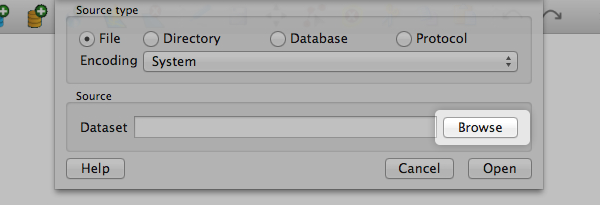
Once in QGIS, first load the shapefile by clicking the Add Vector Layer button.

-
Click Browse then find your shapefile and Open it.
-
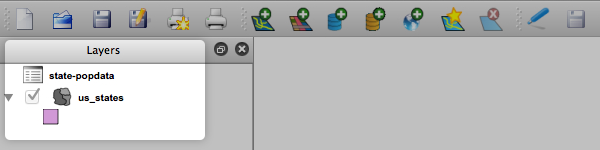
You should now see the geometry displayed in the map window and the filename in the Layers panel.
-
Repeat steps 1 and 2 for your .dbf file. When opened, the .dbf will not display anything in the map window, but will show up in the Layers panel.
-
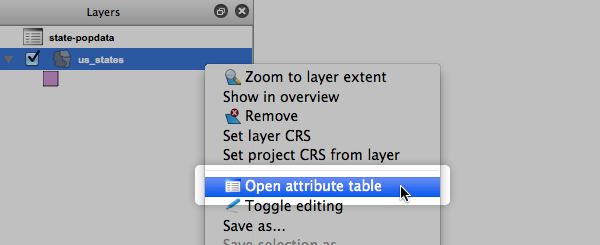
Look at the shapefile’s attribute table by right clicking on the layer name and selecting Open attribute table.
-
Here you can view your shapefile’s data table and determine which field should be used for the join. The
STATEfield is what we want in this example.
-
Close the attribute table.
-
Open the shapefile’s Properties by double-clicking on the layer name.
-
Go to the Joins tab.

-
Click the + button to add a join.

-
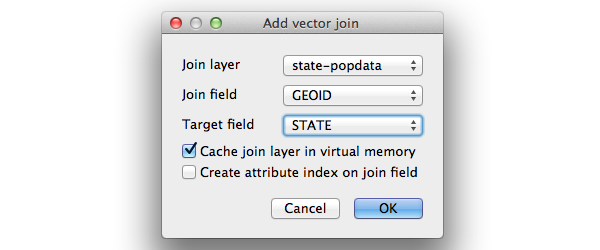
You will be prompted with the Add vector join tool.
-
Join layer will be your .dbf data layer. In this case
state-popdata. -
Join field is the key field to be joined on in your .dbf data. In this case
GEOID. -
Target field is the key field to be joined on in your shapefile. In this case
STATE -
Leave the rest as is and click OK.
-
Open the shapefile’s attribute table once again and check that your data has been properly joined. Note that this join is temporary for now. To make a permanently joined shapefile you must save a new copy.
-
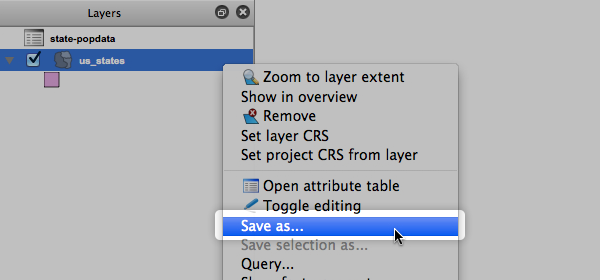
Right click the shapefile and select Save as…
-
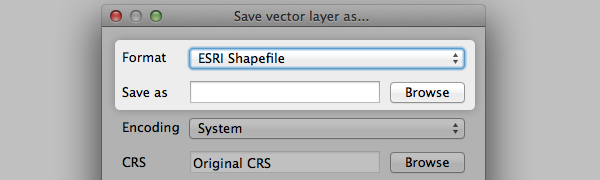
Format should be ESRI Shapefile. Everything else can be left as is.
-
Choose a filename and location for your new shapefile and click OK.
-
This newly created shapefile now has both the geometry and the data included and can be directly imported into TileMill. It should consist of at least four files with the same name but different extensions (.shp, .shx, .dbf, .prj). These must remain together.
Joining CSV files
CSV files can be joined in the very same way. This is a commonly used format that can be read by many applications, including Quantum GIS. However, QGIS interprets all CSV columns as strings by default, which is a problem if you intend to use numbers to conditionally style your map.
As a solution you can create an accompanying .csvt file which allows you to specify column types for your CSV file. To create one open up a new document in any text editor.
The .csvt file contains only one line. Column types are in quotes and separated by commas. The order should be the same as the column order in your CSV.
So if your CSV columns looks like this:
geoid,name,population
where the geoid and name contain strings, and the population field contains numbers, the content of your .csvt would look like this:
"String","String","Real"
Save the file with the same name as your CSV but with the .csvt extension and keep it in the same folder. That’s it. You do not ever have to load the .csvt file, it remains associated with your CSV in the background.
Adding a shapefile layer to your TileMill project.