Working with PostGIS
Installed TileMill on your computer.
Reviewed Crash Course
As we’ve worked through in adding CSV data and shapefiles to a TileMill project in previous articles here, you can also add data from a PostGIS database.
PostGIS is an extension for PostgreSQL databases for storing, manipulating, and retrieving spatial data. PostGIS (along with Mapnik) powers the main maps on openstreetmap.org (OSM) and open.mapquest.com.
If you are not familiar with PostGIS or PostgreSQL, check out the documentation for both PostgreSQL and PostGIS. These resources are great places to start if you are setting up a database for the first time.
For this example, we’ll cover the basics of creating a simple PostGIS database and making a connection to the database in TileMill. We’ll also cover joining data to add attribute data to your features. We’ll use Census data for the District of Columbia Census Tracts for this example.
Download the data
- To begin, download the District of Columbia Census Tract TIGER/Line shapefile from the U.S. Census Bureau. Select
Census TractsandDistrict of Columbiafor Census Tract (2010). ChooseDistrict of Columbiain the final menu. A zipped shapefile will be downloaded. - Unzip the shapefile
- Download Census Tract data for the District of Columbia from the CENSUS.IRE.ORG. Select
P1. Total Populationand download as CSV.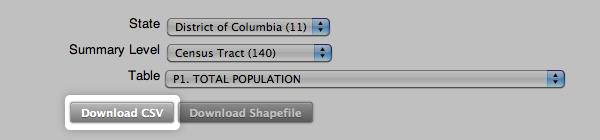
- For a smooth import into a PostGIS database, we need to clean up the headers within the CSV. Open the CSV in a text editor. The first line is the header line. Within the header line, remove any periods (“.”). Save your changes.

Creating a simple PostGIS database
- After you’ve installed both PostgreSQL and PostGIS using the online documentation from both sites, you need to create a database for use with spatial data. Navigate to where your PostGIS configuration installed the SQL files, typically
[prefix]/share/contrib/. See the PostGIS documentation for installation details. - Run the following commands:
 createdb dc-census
 createlang plpgsql dc-census
 psql -d dc-census -f postgis.sql
 psql -d dc-census -f spatial_ref_sys.sql
- Now that your database is spatially-enabled, you can use the shapefile uploader to load features into the database. Navigate to where you downloaded the shapefile,
tl_2010_11001_tract10.shpand run:
shp2pgsql -c -D -s 4269 -I tl_2010_11001_tract10.shp dc_census_tracts | psql -d dc-census
- Enter a psql terminal by typing
psql dc-census. - We now need to create a new table to insert the population data. From the psql terminal, run:
CREATE TABLE dc_census_data (GEOID varchar(11), SUMLEV varchar(3), STATE varchar(2), COUNTY varchar(3), CBSA varchar(5), CSA varchar(3), NECTA integer, CNECTA integer, NAME varchar(30), POP100 integer, HU100 integer, POP1002000 integer, HU1002000 integer, P001001 integer, P0010012000 integer);
- Exit the psql terminal by typing
\q. - Navigate to the location of the census data CSV file,
all_140_in_11.P1.csv. - We’ll now copy the CSV file and insert it into the new table we just created in Step 5. Run:
cat all_140_in_11.P1.csv | psql -d dc-census -c 'COPY dc_census_data FROM STDIN WITH CSV HEADER'
- Enter the psql terminal agin by typing
psql dc-census. You can see your new tables by typing,\d.
Adding data in TileMill
- Create a new TileMill project called
dc-census. - Click to add a new layer.
- Change the add layer type to PostGIS. You will see the fields change.
- Enter
dc-censusin the ID field.
- Enter the connection parameters to connect with your local PostGIS database. You need to provide
host,port,user,password, anddbnameinformation. Here since we’re working on a database locally,host=localhost.Port=5432, and we’ve named our database,dc-census. Use the username and password for the authentication that is set up for your database. (See the note “Protecting your PostGIS password” below for a more secure method.)
- Enter the Table or subquery information to access your data. This is a query to select the data from your PostGIS database. This field acts as a subquery so the information must be entered in a subquery fashion:
( SELECT * from dc_census_tracts ) AS tracts. The name you specify after “AS” is arbitrary and does not affect theIDfield you gave at the top. Here we’ve entered,( SELECT * from dc_census_tracts ) as tracts, which selects all the columns in the table. To only select the columns you want to call from our database table, omit the*and enter the column names directly.
- Enter the extent of your data. The coordinate system you use should match your data. The correct order is
left bottom right top. This can be determined easily through a SQL query in your PostGIS database. In our example database, we would run the query:SELECT ST_EXTENT(the_geom) from dc_census_tracts
Enter:
-77.119759,38.791645,-76.909393,38.995548
- Enter the Unique Key Field for your database feature. This is the database field containing a unique key for your table or feature. See below for a note about indexing and optimizing your PostGIS database.

- Enter the Geometry Field for your database feature. If you are using the shp2pgsql data loader for PostGIS, this default field name will be
the_geom.
- Select the Spatial Reference System (SRS) for your feature. This will be the projection your data is in PostGIS. Since the Census TIGER/Line data is projected in the NAD83 geographic projection (EPSG:4269), we will use custom parameters here for TileMill to assume the correct datum and ellipsoid for projecting data (we have provided the correct custom parameters here, but can also be obtained from here).
Select Custom and enter
+proj=longlat +ellps=GRS80 +datum=NAD83 +no_defs.
- Click Save and Style to save your connection and style with the default CartoCSS settings.

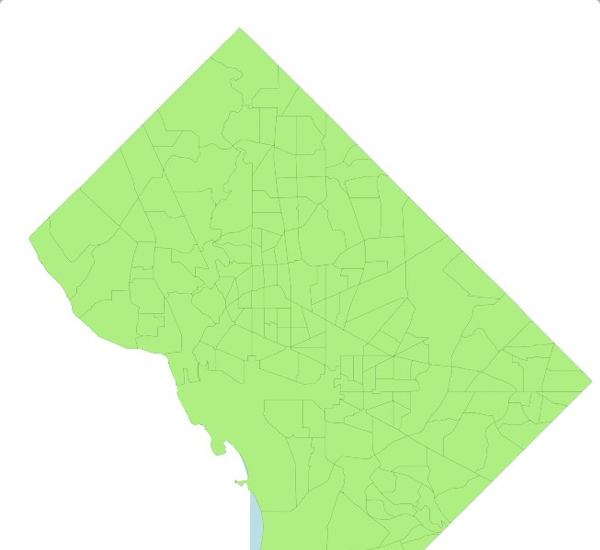
- Preview the result in the map preview pane.
Joining attribute data in TileMill
- From within the Editor window of the
dc-censusproject, toggle on the layer selector and click Edit next to thedc-censuslayer you just added in the previous section.
- Within the Table or subquery field, adjust the existing query to be:
SELECT * from dc_census_tracts JOIN data on dc_census_tracts.geoid10 = data.geoid
Here we are creating a SQL left join of the attribute data,
dc_census_datawith our geographic feature table,dc_census_tracts.
- Click Save to save your changes.
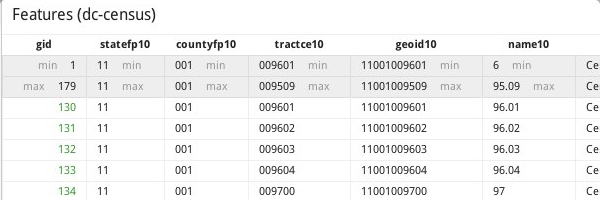
- Within the layer menu, click the Features button to explore the data table. You will now see the attribute data columns.

- Click the X or hit the
escon your keyboard to exit out of the table view. You can now begin to use conditional styles or add additional data to your interactivity.
Note: Indexing and Optimizing PostGIS data
To achieve fast and optimized results in TileMill, use good database management by indexing your data tables with both a unique index on your row ID and a gist index on your geometry column. See the [Building Indexes](http://postgis.net/docs/manual-2.0/using_postgis_dbmanagement.html#idp33197344) section of the PostGIS manual for a beginning reference.Note: Protecting your PostGIS password
The PostGIS password in your connection string is stored, unencrypted in your `project.mml` file. If your database is publicly accessible, this means that if you share your `project.mml` with anyone, they will also be able to access your database, which you may not want. One way to protect it is by using a [.pgass file](http://www.postgresql.org/docs/8.4/static/libpq-pgpass.html) as follows: 1. Create the file `/usr/share/mapbox/.pgpass` 2. Give it contents like this, changing the values as appropriate:`dbhost.example.com:*:mydbname:myusername:mypassword` 3. Set it to be owned by the mapbox user, and not readable by anyone else:
`chown mapbox:mapbox /usr/share/mapbox/.pgpass` `chmod 600 /usr/share/mapbox/.pgpass` 4. In the TileMill layer settings, specify the connection string as: `host=dbhost.example.com dbname=mydbname user=myusername` Don't include the password here.
Using conditional styles to control the appearance of points based on data.
Using MapBox to upload and composite your map.