Selectors
Installed TileMill on your computer.
Reviewed Crash Course
CartoCSS styles are constructed by applying blocks of style rules to groups of objects. Style blocks are bounded by curly braces ({}) and contain various style properties and values. Selectors are what allow you restrict these styles to specific layers or groups of objects within layers.
Simple Selectors
By ID
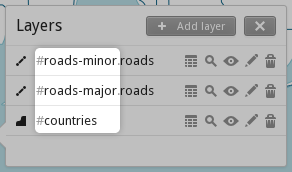
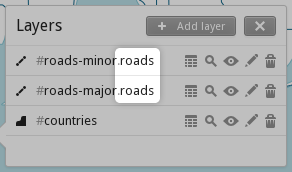
The simplest selector is to select all of the objects from a single layer by the layer’s ID. Each layer ID can be seen in the Layers list after a hash (#). This is also how the ID is referenced in CartoCSS:
#layer_name { /* styles */ }
You can separate multiple layer IDs with commas to select them for a single style:
#layer_1,
#layer_2 {
  // styles will apply to all the objects in both layers
}
By Class
You can also assign classes to layers to select multiple layers more simply. Classes are defined in each layer’s configuration window and show up in the layers list folowing a dot (.). Multiple classes can be assigned to a single layer - separate them with spaces in the Class field.
.roads {
  // styles will apply to all layers
  // with a class of 'roads'
}
Filter Selectors
You can modify selections with filters that reduce the number of objects a style applies to based on certain criteria. For example, you might have all your roads in a single layer, but you could use filters to specify different line colors for different road classifications.
Filters let your style read into the various text and numeric properties attached to each object in a layer. (You can browse this data by clicking on the table icon for a given layer.)
Filters are written inside square brackets either right after an ID or Class selector, or nested inside a larger style block. (While it’s possible to use filter selectors on their own, it’s almost always the case that you will want to use them in combination with an ID or class selector.)
Zoom level filters
One of the most common filters doesn’t read into the data itself, but is a special filter to restrict styles to certain zoom levels. For example, this style will only apply when your map is zoomed all the way out to zoom level 0:
#layer[zoom=0] { /* style */ }
You can specify ranges of zoom levels using two filters:
#layer[zoom>=4][zoom<=10] { /* style */ }
Valid operators for zoom filters are = (equal to), > (greater than), < (less than), >= (greater than or equal to), <= (less than or equal to), != (not equal to).
You can nest filters to better organize your styles. For example, this style will draw red lines from zoom levels 4 through 10, but the lines will be thicker for zoom levels 8, 9, and 10.
#layer[zoom>=4][zoom<=10] {
  line-color: red;
  line-width: 2;
  [zoom=8] { line-width: 3; }
  [zoom=9] { line-width: 4; }
  [zoom=10] { line-width: 5; }
}
Numeric value comparison filters
The same comparison operators available for the zoom filter can also be used for any numeric column in your data. For example, you might have a population column in a file full of city points. You could create a style that only labels cities with a population of more than 1 million.
#cities[population>1000000] {
  text-name: [name];
  text-face-name: 'Arial Regular';
}
You could also combine multiple numeric filters with zoom level filters to gradually bring in more populated cities as you zoom in.
#cities {
  [zoom>=4][population>1000000],
  [zoom>=5][population>500000],
  [zoom>=6][population>100000] {
    text-name: [name];
    text-face-name: 'Arial Regular';
  }
}
As with zoom levels, you can select data based on numeric ranges.
#cities[population>100000][population<2000000] { /* styles */ }
Basic text comparison filters
You can also filter on columns that contain text. Filter on exact matches with the equals operator (=) or get the inverse results with the not-equal operator (!=). Unlike zoom and numeric values, text values must be quoted with either double or single quotes.
As an example, look at the ‘10m-roads’ shapefile from Natural Earth (available in TileMill via the MapBox GeoData Library). It contains a column called Type, and each value for this column is one of just a few options: “Major Highway”, “Secondary Highway”, or “Ferry Route”. This makes it a good column to filter on for styling.
#roads {
  [Type="Major Highway"] {
    line-width: 4;
  }
  [Type="Secondary Highway"] {
    line-width: 2;
  }
  [Type="Ferry Route"] {
    line-dasharray: 4,4;
  }
}
To select everything that is not a ferry route, you could use this filter:
#roads[Type!="Ferry Route"] { /* style */ }
Regular expression filters
Note: This is an advanced feature that may have negative performance implications.
You can match text in filters based on a pattern using the regular expression operator (=~). This filter will match any text ending with ‘ Highway’ (ie, both ‘Major Highway’ and ‘Secondary Highway’).
#roads[Type=~".* Highway"] { /* style */ }
The . represents ‘any character’, and the * means ‘any number of occurrences of the preceding expression. So .* used in combination means ‘any number of any characters’.