Discrete Raster Data
Installed TileMill on your computer.
Reviewed Crash Course
Set up GDAL for processing raster data in the terminal.
Note: This guide uses the rule raster-colorizer which is currently only in the dev build of TileMill
Discrete Raster Data: Land Cover
Contextually styling a discrete raster data set – a task once completed over several steps across different applications – can be completed within TileMill, our open source design studio. When you contextually style raster data, you bind a color value to particular pixel values, which is great for highlighting urban areas using a bright color, making no-data pixels appear transparent, and grouping similar categories, like types of tree cover, into larger categories and making them all green.
Here we will make a custom land cover map layer from a raster dataset. This guide uses this one available from the Japan Aerospace Exploration Agency. Here is a direct link to the zip file.
The only pre-processing required is to reproject the dataset to Google Mercator projection, using an application like gdalwarp. All styling of the raster data can be accomplished from within TileMill using CartoCSS.
Pre-processing
After downloading and uncompressing the GeoTiff data, warp each image to the proper projection as we did to the Natural Earth GeoTiff.
Warp all the images and move the reprojected ones to a directory called target (using Terminal):
ls *.tif > abc
mkdir target
while read line
do
file=$(echo $line |awk -F. '{ print $1 }')
gdalwarp -t_srs EPSG:3857 $line target/$file.tif
done < abc
Build a Virtual Dataset
Since TileMill natively supports GDAL’s Virtual Raster (VRT) format, we can take advantage of a VRT rather than creating a new GeoTIFF mosaic. gdalbuildvrt creates a single XML file from the source images that is read as a single mosaic image in TileMill. Make sure you use absolute paths for the source images when you use gdalbuildvrt.
$ gdalbuildvrt mosaic.vrt /absolute/path/to/input/tiffs/*.tif
Importing and Styling in TileMill
While in the TileMill “Add Layer” window, input band=1 in the Advanced input area. If you omit this step, the colorizer will not function properly.
Since we’re using a land cover GeoTIFF with specific pixel values mapping directly to land cover classifications we want to use raster-colorizer-default-mode: exact meaning stops will map to exact pixel values, and no other color values will be assigned through interpolation.
Now all that remains is to translate the land use data key into CartoCSS style rules, using the raster-colorizer stop syntax:
stop( + pixel value + , + color to assign + )
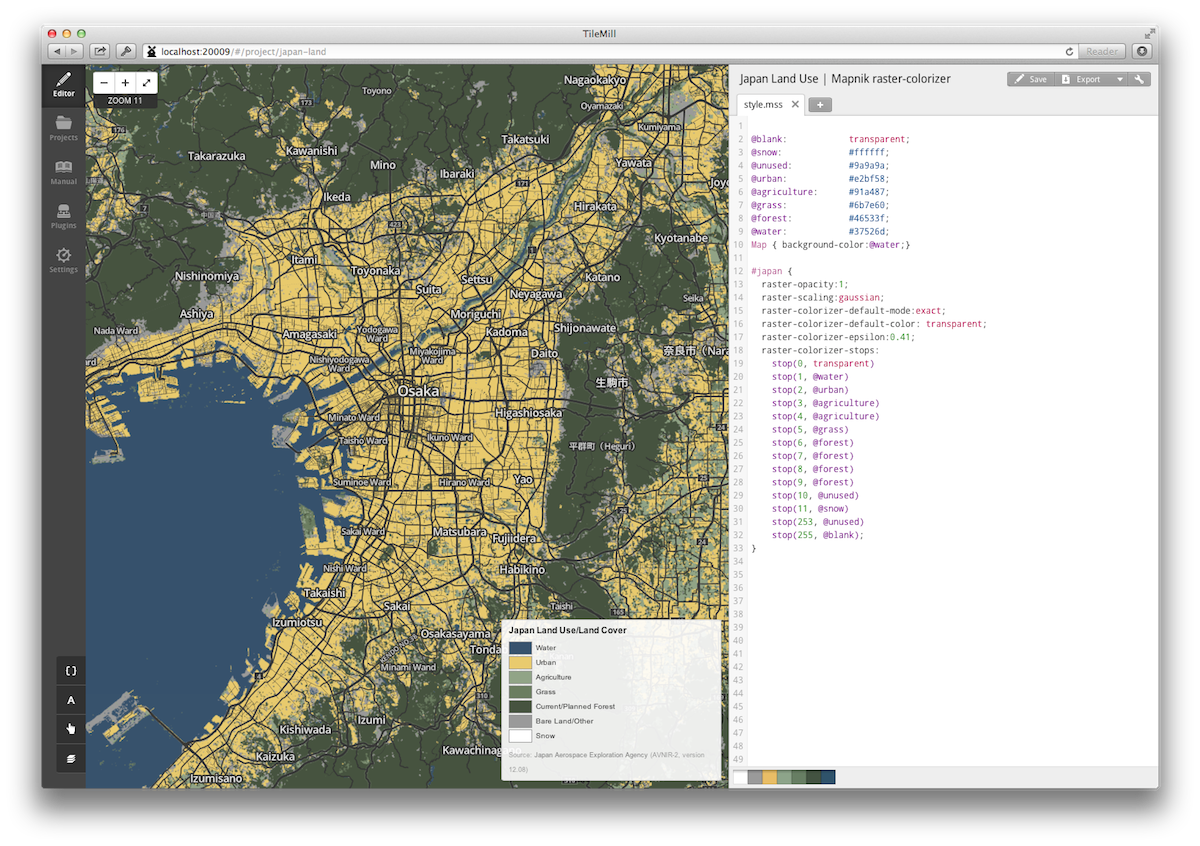 Japan Land Use
@blank:            transparent;
@snow:             #ffffff;
@unused:           #9a9a9a;
@urban:            #e2bf58;
@agriculture:      #91a487;
@grass:            #6b7e60;
@forest:           #46533f;
@water:            #37526d;
Map { background-color:@water;}

#japan {
  raster-opacity:1;
  raster-scaling:gaussian;
  raster-colorizer-default-mode:exact;
  raster-colorizer-default-color: transparent;
  raster-colorizer-epsilon:0.41;
  raster-colorizer-stops:
    stop(0, transparent)
    stop(1, @water)
    stop(2, @urban)
    stop(3, @agriculture)
    stop(4, @agriculture)
    stop(5, @grass)
    stop(6, @forest)
    stop(7, @forest)
    stop(8, @forest)
    stop(9, @forest)
    stop(10, @unused)
    stop(11, @snow)
    stop(253, @unused)
    stop(255, @blank);
}
Finished Map
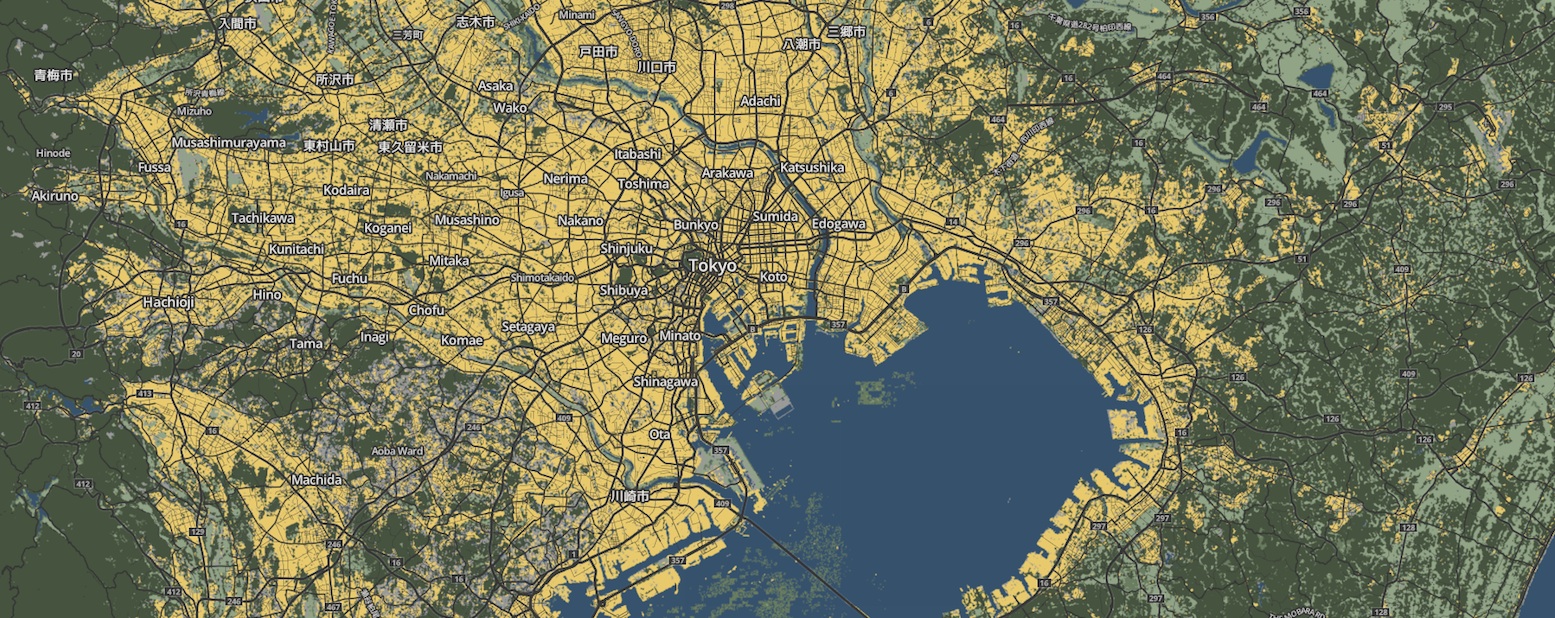
Japan Land Cover Finished map