Color Correction of RGB Imagery
Installed TileMill on your computer.
Reviewed Crash Course
Set up GDAL for processing raster data in the terminal.
Note: This guide uses the rule raster-colorizer which is currently only in the dev build of TileMill
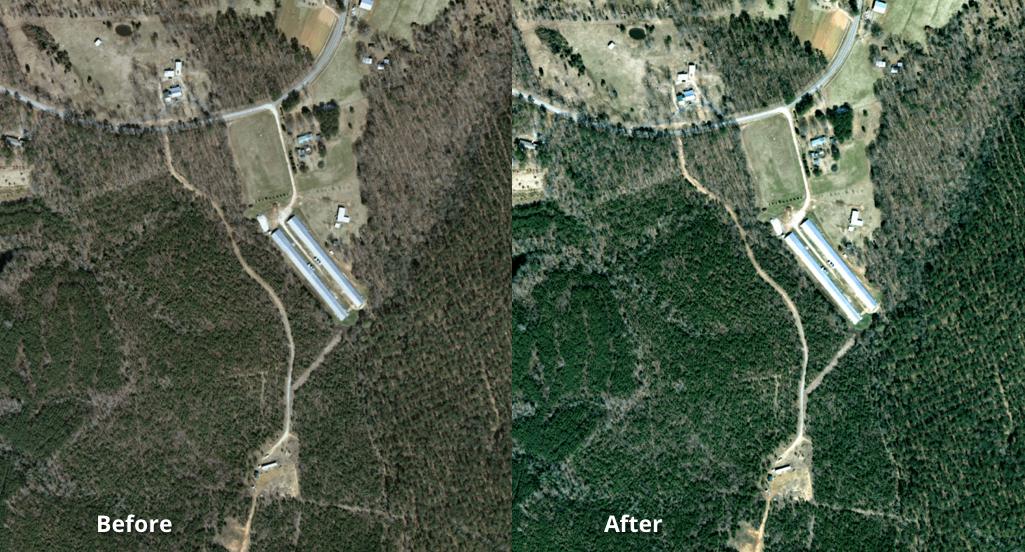
Following a similar process to Single-band colorizing, we can perform color correction for 3-band natural-color RGB aerial or satellite imagery from within TileMill. Performing the color modifications from within TileMill is much easier and offers greater customization than my previous methods offered.
RGB Imagery
Normally, when you load an RGB image as a layer in TileMill the layer displays as natural color. To take advantage of the raster-colorizer functionality, we need to add the layer three times, including in the advanced option of band=1 for the red layer, band=2 for the green layer, and band=3 for the blue layer. The band= advanced option has TileMill load only the indicated band.
To turn the three layers back into an RGB image, you’ll want to use raster-comp-op: plus; and raster-colorizer-default-mode: linear; for each layer.
| 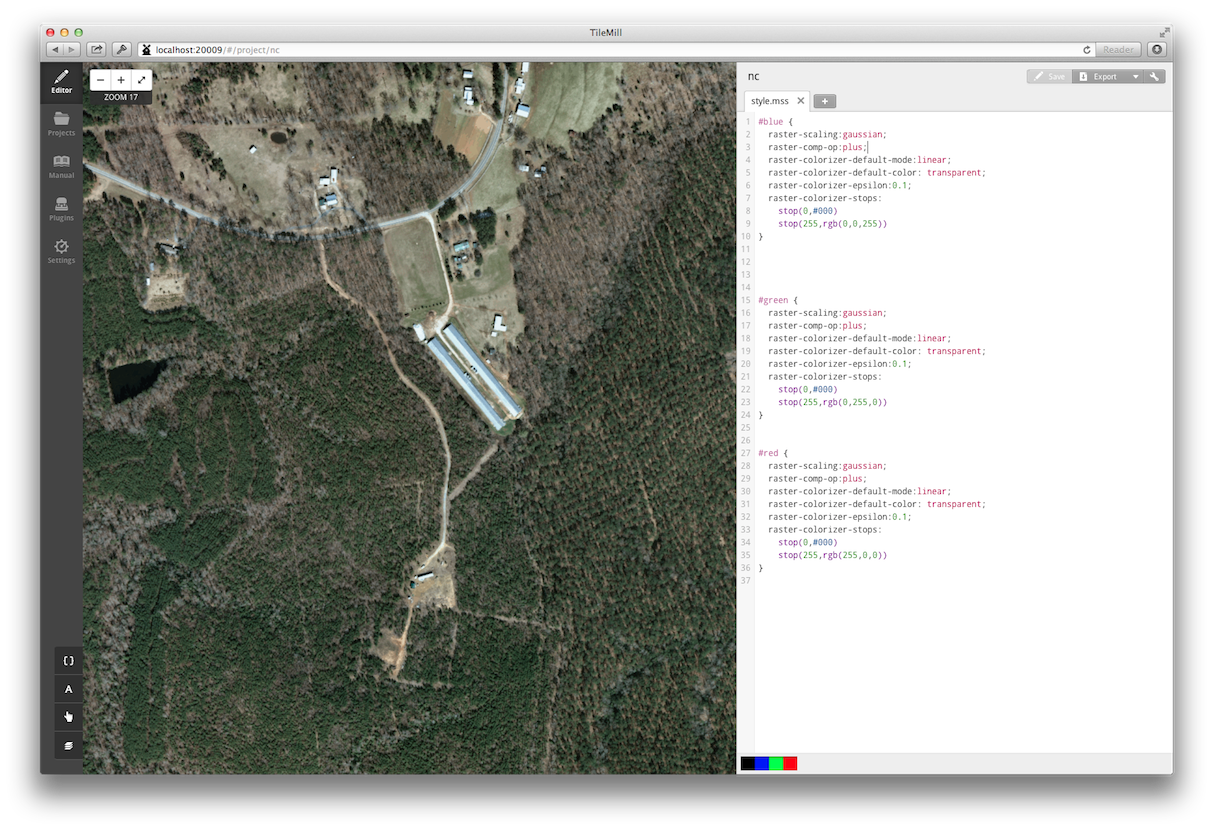 |
Before color correction
#red {
  raster-scaling:gaussian;
  raster-comp-op:plus;
  raster-colorizer-default-mode:linear;
  raster-colorizer-default-color: transparent;
  raster-colorizer-epsilon:0.1;
  raster-colorizer-stops:
    stop(0,#000)
    stop(255,rgb(255,0,0))
}
#green {
  raster-scaling:gaussian;
  raster-comp-op:plus;
  raster-colorizer-default-mode:linear;
  raster-colorizer-default-color: transparent;
  raster-colorizer-epsilon:0.1;
  raster-colorizer-stops:
    stop(0,#000)
    stop(255,rgb(0,255,0))
}
#blue {
  raster-scaling:gaussian;
  raster-comp-op:plus;
  raster-colorizer-default-mode:linear;
  raster-colorizer-default-color: transparent;
  raster-colorizer-epsilon:0.1;
  raster-colorizer-stops:
    stop(0,#000)
    stop(255,rgb(0,0,255))
}
With the layer rendering as an RGB image in TileMill, you can now apply color corrections to each band, simply by modifying the raster-colorizer-stops.
A good starting place for color correcting in this manner is to adjust the min, max, and mean values. We found red and green bands looked best when we set the minimum to 20 and maximum to 200; for the blue band I set the minimum value to 40. For the red layer, pixels with values less than or equal to 20 are all registered as the darkest dark elements of the band, and all pixels with values greater than or equal to 200 are registered as the brightest red.

| 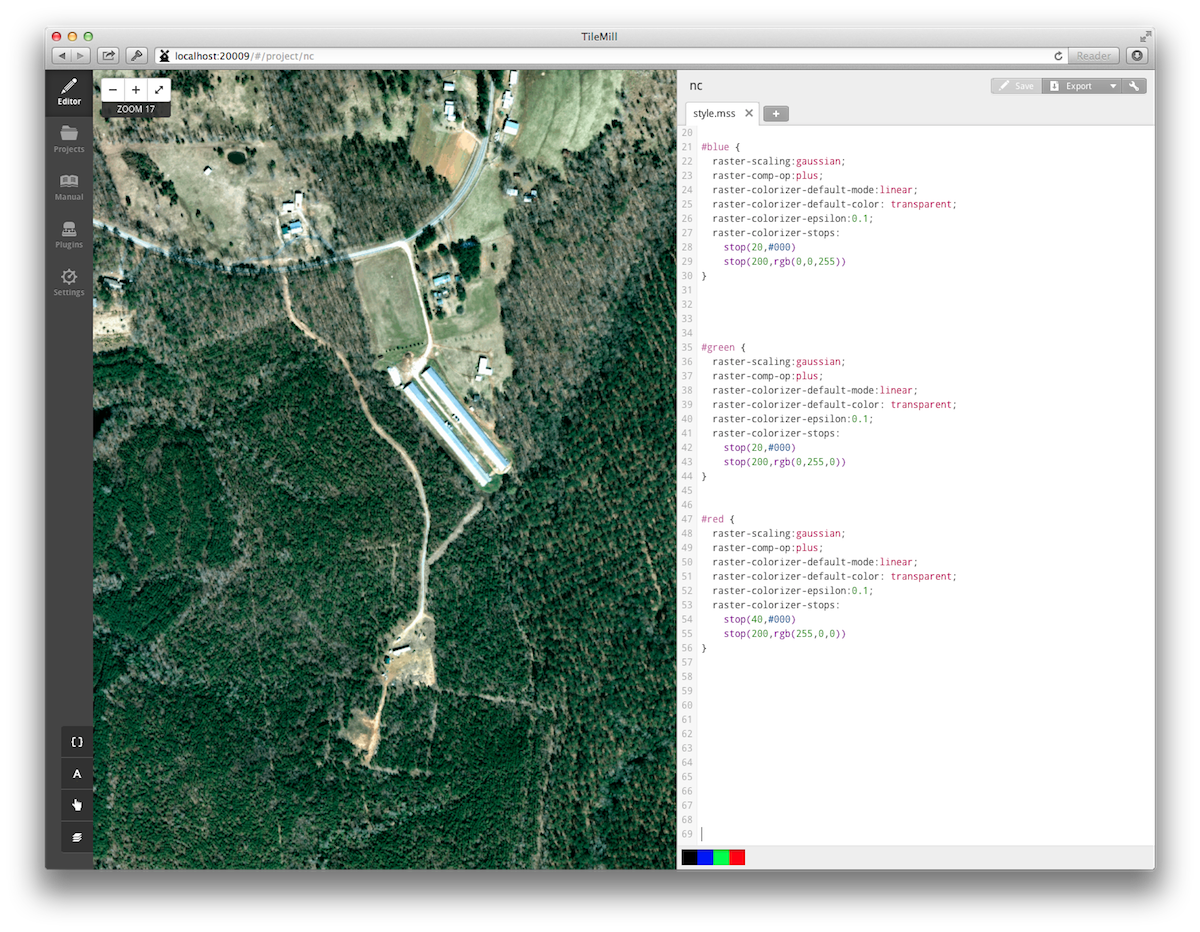 |
After color correction
#blue {
  raster-scaling:gaussian;
  raster-comp-op:plus;
  raster-colorizer-default-mode:linear;
  raster-colorizer-default-color: transparent;
  raster-colorizer-epsilon:0.1;
  raster-colorizer-stops:
    stop(20,#000)
    stop(200,rgb(0,0,255))
}
#green {
  raster-scaling:gaussian;
  raster-comp-op:plus;
  raster-colorizer-default-mode:linear;
  raster-colorizer-default-color: transparent;
  raster-colorizer-epsilon:0.1;
  raster-colorizer-stops:
    stop(20,#000)
    stop(200,rgb(0,255,0))
}
#red {
  raster-scaling:gaussian;
  raster-comp-op:plus;
  raster-colorizer-default-mode:linear;
  raster-colorizer-default-color: transparent;
  raster-colorizer-epsilon:0.1;
  raster-colorizer-stops:
    stop(40,#000)
    stop(200,rgb(255,0,0))
}
Installed TileMill on your computer.
Reviewed Crash Course
Set up GDAL for processing raster data in the terminal.